
Pressure Canning Safety for Beginners
New to pressure canning and not sure where to start? Here’s the first thing you need to know: pressure canning safety for beginners matters just as much as the recipe itself.
Pressure canning is an essential skill in any homesteading journey and one of the most reliable ways to ensure food security, food safety, and self-reliance on your homestead—especially when preserving low-acid foods.

Growing up on a small farm, with a family of nine, my mom and us kids grew a huge garden. Nearly all of our produce was preserved through pressure canning, water bath canning, or pickling.
With only one freezer at the time, home canning wasn’t just a hobby; it was how we fed our family year-round and stored our home-canned food safely at room temperature.

In this post, I’m covering the basics of pressure canning safety, especially for first-time and new canners who may feel intimidated by that big old metal pot.
Pressure canners tend to get a bad reputation; stories of exploding jars, holes in ceilings, or dangerous accidents often scare people away before they even start.
While there are safety issues to be aware of, modern pressure canners are safe when used correctly.
When you’re new to pressure canning, learning everything at once can feel overwhelming.
That’s why this guide focuses on using your pressure canner properly to prevent burns, jar breakage, and other common mistakes—so you can preserve your own food confidently and safely.
If you’re new to canning, I have a post about getting canning supplies on a budget, an easy and quick guide that lists everything you need to get started canning.

Note: In all my 25+ years of pressure canning food and all my moms 55+ years of pressure canning, we have never had a pressure canner explode or cause serious injury.
So I can safely say, pressure canners have safety features built in that prevent this. So there is no risk of one exploding.
What Is Pressure Canning and Why Safety Matters
To fully understand safe pressure canning procedures, you first need to understand how a pressure canner works—and why it’s so important to follow specific guidelines when preserving low-acid foods.

Pressure canning isn’t flexible or forgiving; it relies on precise temperatures, pressure, and timing to keep food safe.
Pressure canners are built for one purpose: to reach high temperatures that kill harmful bacteria in low-acid canned foods sealed inside glass jars.

These temperatures cannot be achieved with water bath canning, which is why pressure canning is the only safe method for preserving foods like meats, vegetables, and stocks.
When I talk about safety in this post, I’m covering both food safety and personal safety.
Food safety focuses on preventing illness from improperly canned foods, while personal safety is about protecting yourself when working with a very hot, high-pressure piece of equipment.
A pressure canner demands respect, and understanding how it works makes all the difference.
Without proper handling, it’s easy to burn yourself, damage equipment, or end up with jars breaking during the canning process or after.
That’s why learning a few key safety measures—and using them every time you pressure can—is essential for confident, successful home canning.
Pressure Canning vs Water Bath Canning
Here is the major difference between these two canning methods: all canning recipes fall into one of two categories.
Foods are either water bath canned or pressure canned, and choosing the correct method is critical for food safety.
Water bath canning is used for high-acid foods or foods with enough added acid or sugar to prevent bacterial growth. This includes tomatoes (with added acid), salsas, fruits, jellies, jams, pickles, certain sauces, and syrups.
These foods can be safely processed in a boiling-water canner because the acidic environment, or high sugar content, prevents harmful bacteria from growing at room temperature.

Pressure canning, on the other hand, is required for low-acid foods such as vegetables, potatoes, meats, broths and stocks, seafood, and some sauces.
These foods do not contain enough natural acid to stop bacteria from growing.
To make them safe, they must be heated to a higher temperature than boiling water can reach, something that can only be achieved using a pressure canner.
Now there are canning groups out there that call themselves “Rebel canners,” meaning they water-bath can all types of food, even low-acid foods. But for a very long time…. 3-4 hours for some foods.

If you’re new to canning, I would not attempt to “Rebel can” unless you are 100% confident in your canning skills and think that botulism is a term made up by the government. I’ll let you make that decision on your own.
When it comes to pressure canning safety for beginners, sticking to reliable, research-based, or experience-based methods isn’t about fear—it’s about preserving your own food confidently and safely for your whole family to enjoy.
Understanding Low-Acid Foods and Botulism Risks
Low-acid foods, such as vegtables have low-acid which provides the perfect environment for Clostridium botulinum (botulism) to grow when not properly canned.
So if you decided to “Rebel Can” (water bath can) some carrots, and the carrots did not reach the correct temperature during this process, the botulism spores could grow inside that glass jar, and there is no way for you to know if they are contaminated by botulism.

Since botulism cannot be seen, smelled, or detected by taste (source CDC), proper canning methods should be followed.
Now, the botulism spores can be killed by boiling for 10 minutes before eating. According to the California Department of Public Health.
“If you eat home-canned foods, boil the canned food for at least 10 minutes
before eating to be sure it is safe to eat. High temperatures from boiling
destroy the botulinum toxin.”
And according to the Cleveland Clinic and the Center For Diesease Control... “High temperatures can destroy the toxin that causes botulism.”
“Cook food thoroughly. Heat above 212 degrees Fahrenheit (100 degrees Celsius) will kill botulism-causing bacteria after 10 minutes. Heat above 176 degrees F (80 degrees C) will kill the bacteria after 20 minutes.“
So if you want to rebel can you would be wise to boil your food before consuming or just use pressure canning to eliminate the risk.
The Importance of Tested Canning Recipes
When it comes to the food safety of your canned goods, make sure to follow tested and tried recipes.
When you get recipes from a trusted source, you can guarantee the safety of your canned goods, and you don’t need to worry about making others or yourself sick.
Note: In my mom’s years of canning and mine we have never known anyone to become ill from botulism, nor have we expreinace anyone in our households becoming ill from it.

You can get these recipes from the sites listed here, from experienced canners (such as myself), and from simply understanding time and pressure requirements for certain types of food.
- Ball Blue Book of Canning (Great book if you plan on canning a lot)
- Tested canning recipes from experienced canners (like me! and other bloggers)
- United States Department of Agriculture
- University of Georgia Extension publications
Safety Checks on Pressure Canner Parts
If you are starting with a brand new pressure canner, it’s already been tested for accuracy, but if you picked up a used pressure canner, you will need to have it tested for accurate pressure if it has a gauge.
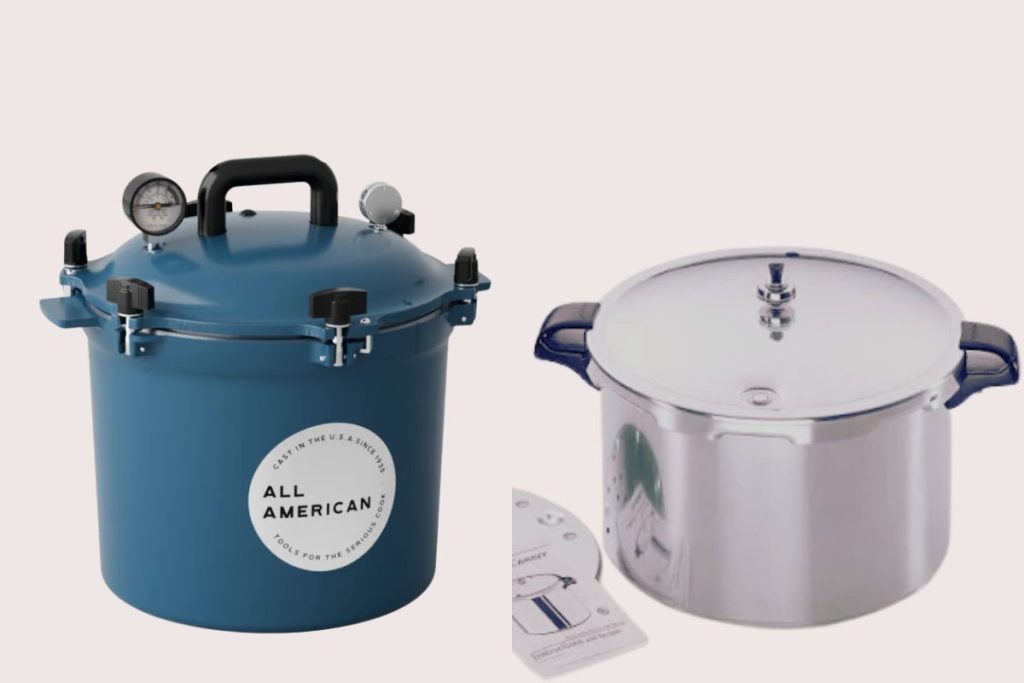
I have two pressure canners, one is a cheap Presto brand with just a weight and no gauge.
The other pressure canner was picked up at a thrift store, and it has a weight and gauge.
I had to get that goldie oldie but beautiful pressure canner tested by my local extension agent to get the pressure gauge tested, and purchase a new rubber seal for the lid, since the old seal was hard.
Your pressure canner should have these parts:
- Vent port
- Steam vent
- Canner lid & rubber seal
- Weight
- Guage (some models)
- Kettle base
- Jar rack (sits on the bottom)
Make sure your pressure canner has all these parts before starting.
If it’s new, it probably has them all, but if it’s used, double-check for all the parts before starting, and make sure the seal is still soft and not hard and dried out.
Note: Pressure canners can work on any type stovetop. I have a propane stove and have pressure canned for years on it. Glasstops also work, but be careful about the weight of the pressure canner when its filled.
Jar Safety: Headspace, Seals, and Handling
Before starting your first pressure canning recipe, check your jars and make sure you have everything ready to go beforehand, and that you are using the right canning jars.
Note: Do not reuse glass jars from products purchased at the grocery store. Such as glass pickle jars or mayonnaise jars.
They are not designed to withstand home pressure canners and will not seal properly and may crack or explode from the extreme heat in the pressure canner.

Here is what I do before I start canning.
- Make sure you have mason jars, tempered glass jars that can handle the heat of pressure canning.
- I wash all the jars in hot, soapy water or run them through a quick cycle in the dishwasher.
- Check my jars for any chips or cracks (these cannot be used for pressure canning), But dont throw them!
- Collect dent-free canning rings (some of mine are a bit used, but they work just fine)
- Make sure I have the right lids on hand. I never reuse lids
- Wide-mouth funnel
- Find the Jar lifter
- Bubble removal tool ( I use a butter knife)
- Canning times & pressure for your elevation
- Kitchen towel for putting jars on after canning
- Pot holders
Note: Pressure canning takes time, never rush through the process and if your planning on pressure canning you will be in the kitchen for a few hours or more. So plan accordingly. You should never leave a pressure canner unattended.

Never use jars that are not rated for pressure canning, or they will crack from the heat and pressure, causing a mess inside your pressure canner.
Follow the recipe guidelines with filling jars, use the correct headspace, which is how far from the lid you should fill with food and water.
I never measure, just use the rim of the jar as my indicator.
Use a ruler if you are unsure of the correct headspace.

If you overfill jars, you can risk bulging lids and improper sealing of the lids. Which can lead to food spoilage if it is not caught right away.
It can also cause siphoning, where the liquid boils out during pressure canning.
If you get siphoning in your pressure-canning jars, don’t throw them! They are still safe; you should just use them first.
Common Pressure Canning Safety Mistakes to Avoid

Pressure canners are an amazing homesteading tool when used properly. Here are a few tips to stay safe while using them.
- Make sure the lid and seal are on correctly. If you notice steam escaping from the seal, it will need to be replaced.
- Do not over-tighten your jar bands; this will cause bulging in your lids, and they will not seal properly.
- It’s normal for some liquid to come out of the vent holes before it pops up and seals.
- If you need to vent steam to stabilize your pressure, use a wooden spoon to carefully release steam. Steam burns are the worst!
- Never remove the pressure canner lid right after canning; let it cool down.
- Let the jars cool a bit in the pressure canner before removing, so the cool air does not stress the hot jars and cause breakage.
- Never leave a pressure canner unattended!

Processing Time, Pressure, and Elevation
This is the most important thing to pay attention to when pressure canning. The time your canned foods are to be pressure canned, the amount of pressure, and the elevation you are at.
Canning times change depending on elevation, so refer to this chart if you’re not sure about elevation and processing times.
So pay close attention to these:
- Pounds of pressure
- Correct processing time
- Total time
- Higher elevations
The most common mistake is not pressure canning long enough.
It’s okay to be nervous your first time pressure canning, you may second-guess yourself, and wonder if the food is actually safe. I can reassure you all the experienced canners have been there and done that also.
Reach out to a friend who is an experienced canner, or email me and I will help as much as I can. Watch youtube videos to help build your confidence also.
Here is what I do after my jars and equipment are ready.
- Add 3 quarts of hot tap water to the pressure canner. (If you have fewer jars, just fill till water is halfway up the jars.)
- Start heating the water on medium-high heat.
- Add vinegar to the water (I have well water, and if I don’t add vinegar, I get bad water marks.)
- Fill jars, wipe rims, add lids and bands. Lightly tighten. (Do not over-tighten!)
- Add jars to the hot water.
- Put the pressure Canner lid on the canner.
- Do not add the weight yet. Wait for steam to come out of the weight hole, and allow steam to vent for 10 minutes.
- Add the weight using a tong or oven mitts.
- Bring up to the right pressure on the gauge or wait for the weight to rattle at a steady pace.
- Start your timer.
- Monitor the gauge to make sure it stays at the right pressure and doesn’t climb or fall.
- Adjust the stovetop heat to keep your pressure steady.
- Once the timer is done. Turn off the heat.
- Let the pressure canner cool down for 25-30 minutes.
- Using oven mitts, remove the weight and lid.
- Lift out jars, carefully, to avoid hitting the jars against the canner.
- Place the jars on a towel to cool.
- Once the jars are cool, remove bands, check for seal, and wash the jars.
- Label and store in a cool, dry space.
Pressure Cooker vs. Pressure Canner
I get this question a lot: “Can we use the Instant Pot to pressure can?” The answer is no. The Instant Pot and other electric pressure canners have not been tested for pressure canning for preservation. They do not maintain the proper temp or pressure required to safely store food at room temperature.

There is one electric pressure canner that was designed specifically for pressure canning jars, and that is the Nesco Pressure Canner. But I am unsure if there have been any tests by the USDA on the temperature and pressure inside this electric pressure canner?
Pressure Canners are built to maintain pressure and temperature safely and accurately. While electric pressure cookers are not. If you want to be a “Rebel Canner,” go for it. But don’t be surprised if your canned foods grow mold or spoil inside the sealed jars.
Pressure Canning Safety Tips for First-Time Canners
If you’re new to pressure canning and feeling nervous, that’s completely normal. The first time I pressure canned green beans, I think I called my mom five times—and I grew up pressure canning right alongside her.
Even with experience, there’s a learning curve, and that’s completely normal.
For your first recipe, choose a simple, tested recipe—green beans or another basic vegetable are a great place to start.
Simple recipes help you focus on learning the canning process, handling your equipment safely, and building confidence without added stress.

Always follow the recommended pressure and correct processing time for your elevation.
Processing times and pounds of pressure vary at higher elevations, and following these guidelines is essential for food safety and properly sealed jars.
Once you understand how to use and handle your pressure canner safely, the entire process starts to feel much more natural.
With each batch, pressure canning becomes less intimidating and more like a reliable, efficient way to preserve your own food with confidence.
The best way to learn is by doing. So get in the kitchen and pressure can your first recipe.
“The best way of learning about anything is by doing.” — Richard Branson
